

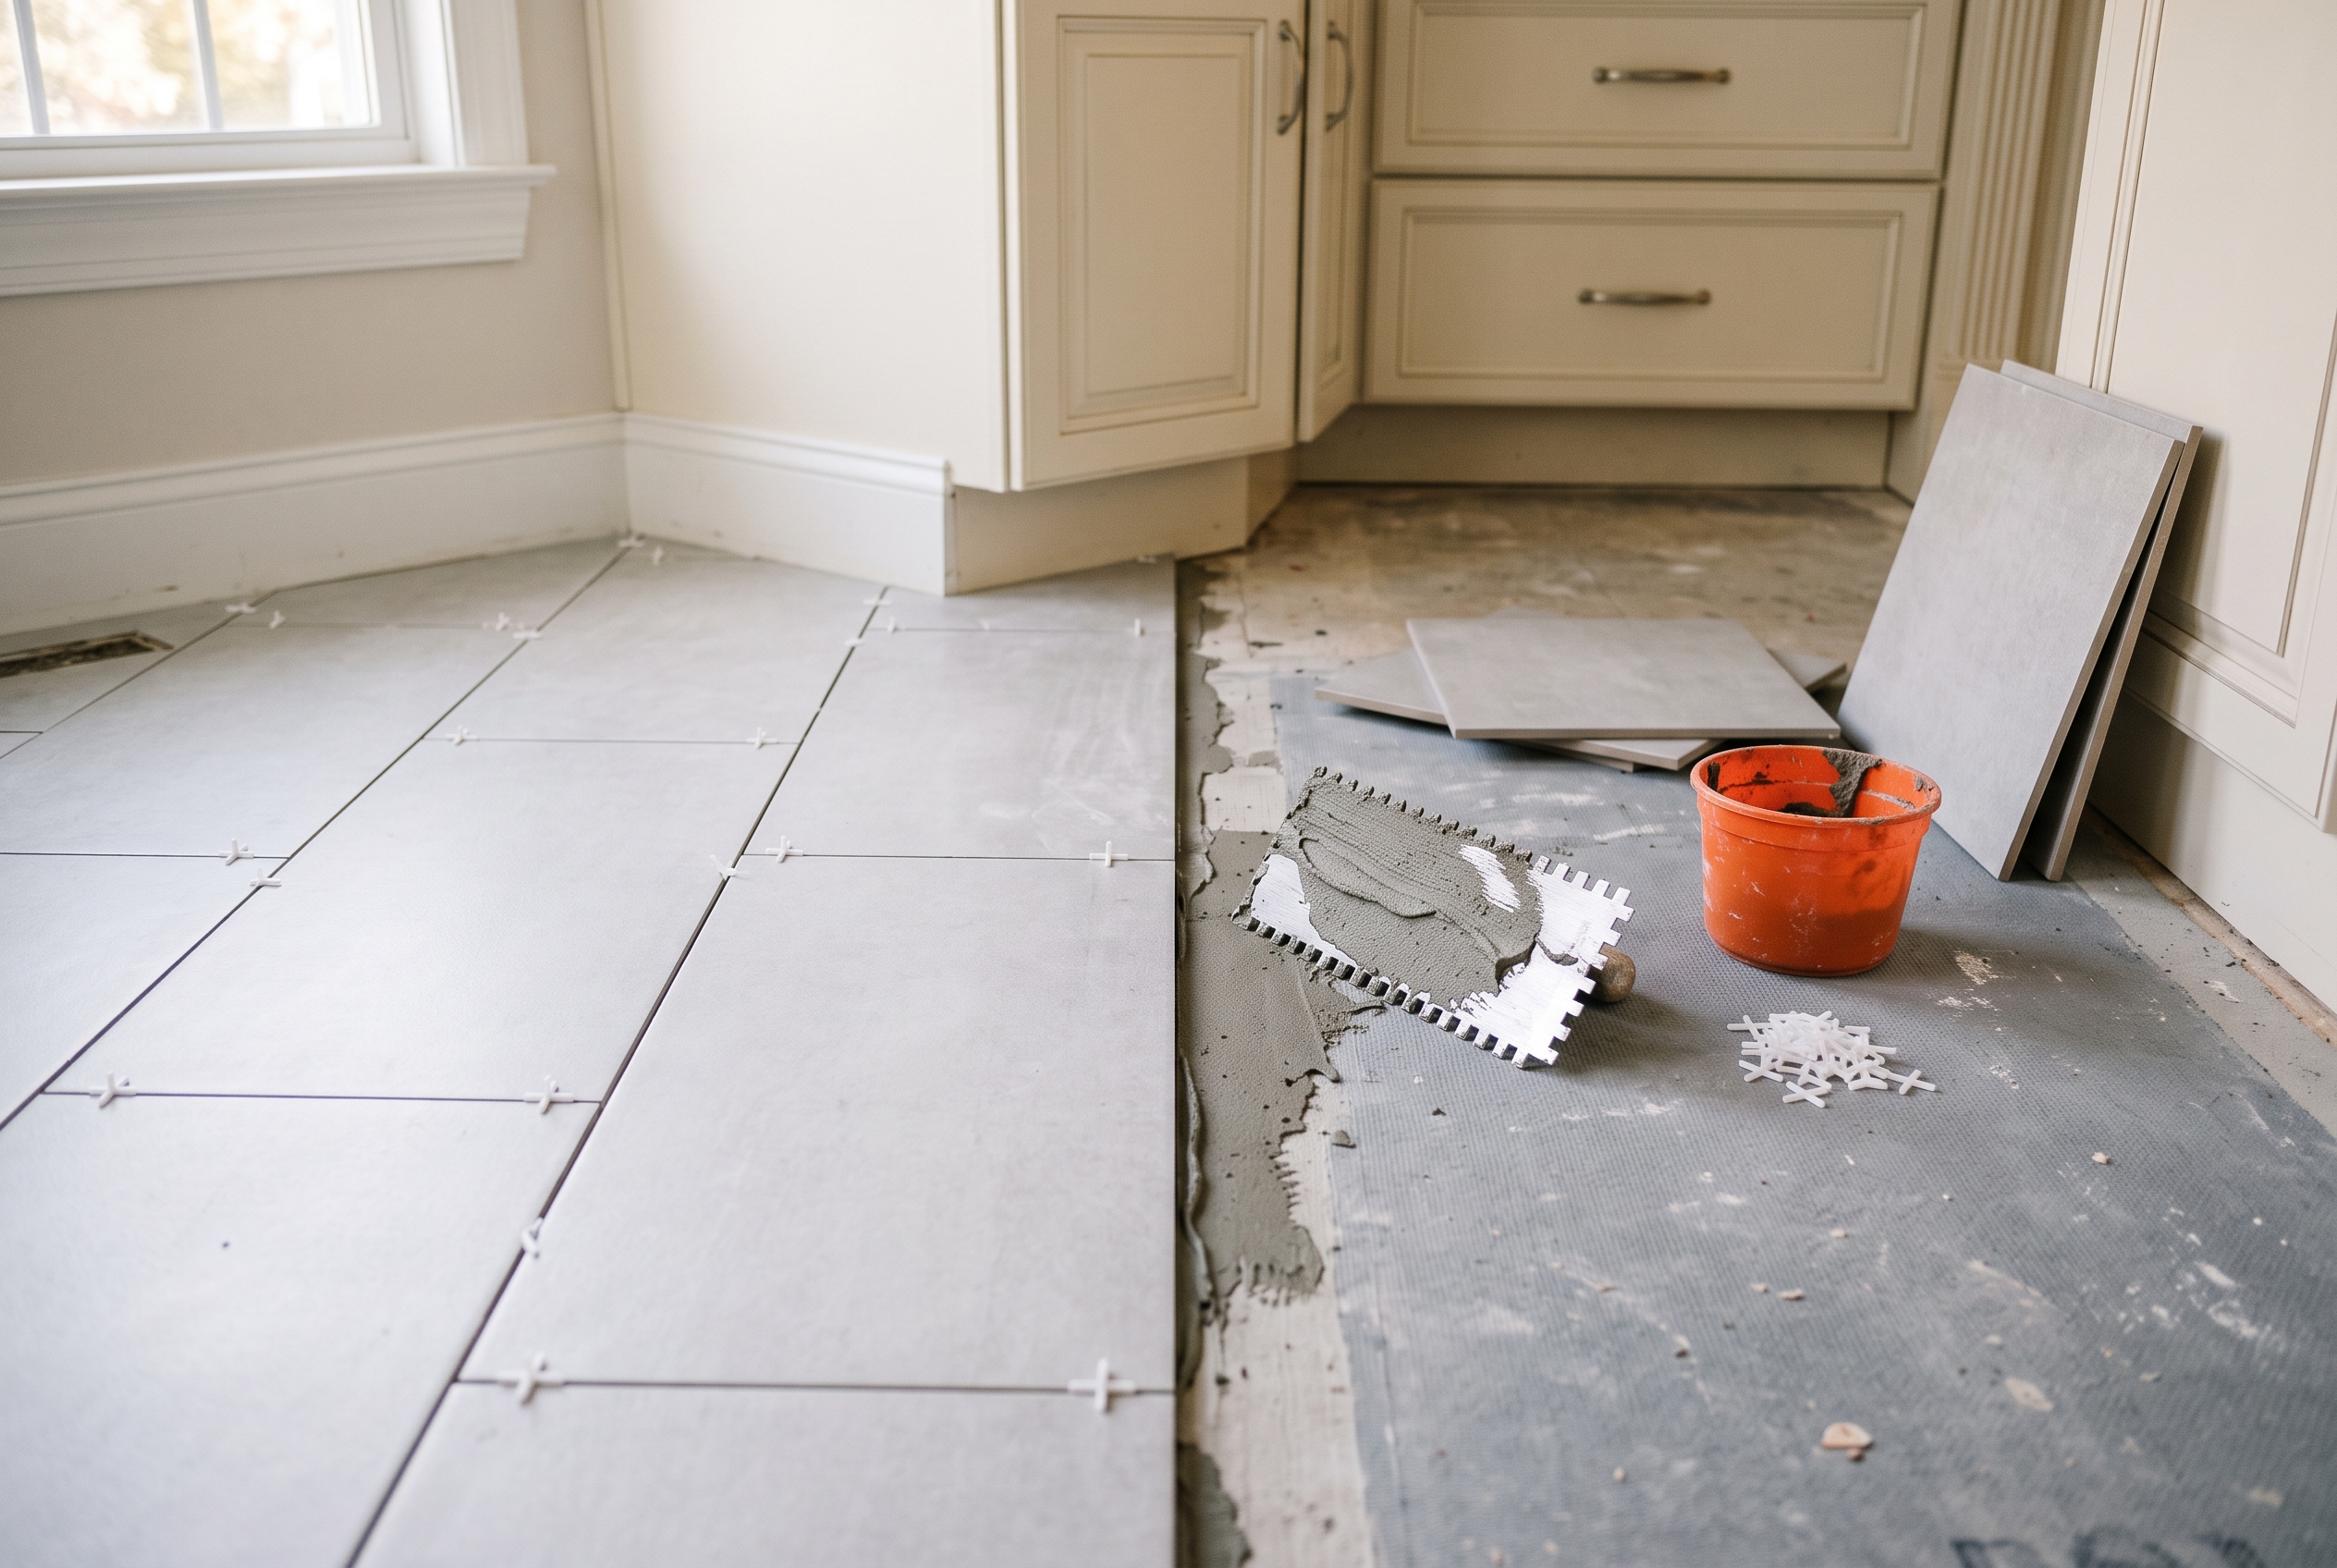
A tile floor that lasts is decided mostly by work you never see once the grout is in. The floor underneath has to be stiff and flat, the right backing has to go over it, thinset has to grip nearly the whole back of every tile, and the edges need soft joints so the floor can move. Get those four right and almost any tile will last for decades.
Over a wood subfloor, the joists and plywood decide the job. That covers most kitchens, bathrooms and upstairs rooms. The floor must barely bend underfoot, and the tile goes on cement backer board or an uncoupling membrane over solid plywood, never straight onto old boards or OSB.
Over a concrete slab, in a basement or a slab-built house, tile bonds to the concrete directly. Any crack in the slab will come up through the tile, though, unless a crack isolation membrane covers it first. New concrete needs about four weeks to cure.
With large tile or wood-look plank tile, meaning any tile with a side 15 inches or longer, the floor has to be twice as flat, more mortar has to reach the back of each tile, and a brick-style pattern should be offset by no more than a third.
Every proper tile floor goes through the same eight stages, and the list doubles as a checklist when you compare quotes.
| Stage | What happens | What proper looks like | Wait before next |
|---|---|---|---|
| Tear-out and inspection | Old floor up, subfloor checked | Loose spots fastened, damage repaired | None |
| Stiffen and flatten | Plywood added, low spots filled | Within 1/4 in. over 10 ft | Until the patch cures |
| Backing | Backer board or membrane laid | Set and fastened per its maker | Per the maker's sheet |
| Layout | Lines snapped, tile dry-laid | No edge cut under half a tile | None |
| Setting | Tile pressed into thinset | Mortar under 80% of each tile | About 24 hours |
| Movement joints | Gap kept at walls and edges | At least 1/4 in., caulked later | None |
| Grout | Joints packed, haze wiped off | Full joints, caulk at walls | 72 hours to heavy use |
| Seal | Sealer, if the grout needs one | Per the grout maker | About three weeks |
What Has to Be Right Under the Tile
Tile is hard and brittle, so the floor under it has to be stiff, sound and flat before any tile goes down. A wood or vinyl floor can flex a little and get away with it; tile has no give at all. When the floor under it bends, the grout cracks first and the tile follows, which is why the first day of a proper tile job is spent on the floor.
How Stiff a Floor Needs to Be for Tile
A floor that will be tiled should bend no more than its span divided by 360 when it is loaded. In plain terms, joists that run 10 feet between supports should sag no more than about a third of an inch in the middle. That happens to be the building code minimum for living space, so most houses built to modern code meet it.
A floor that bounces when you walk across it, or rattles the dishes in a cabinet, usually doesn't. The fix is under the floor: added blocking, a joist doubled alongside a weak one, or a new support, and that carpentry comes before any tile work. No thinset or membrane makes up for a floor that moves.
Natural stone needs a floor twice as stiff, span divided by 720, with two layers of plywood under the backer board instead of one. Most marble, travertine and slate is weaker than porcelain, so our advice is to have the floor checked before you fall in love with a stone tile, because a floor that suits porcelain may still need stiffening first.
Plywood, OSB and Old Board Subfloors
The usual minimum under tile is joists 16 inches apart, a 3/4-inch plywood subfloor, and on top of it a 1/2-inch plywood underlayment or a backer board made for tile. The sheets run across the joists. That combination spreads each footstep over several joists so no single tile carries it.
OSB, the sheathing made of pressed wood chips found in many newer homes, needs care. Thinset makers do not recommend setting tile directly on it, so over OSB the tile goes on a backer board or membrane whose maker approves that subfloor.
Many older homes around Moorestown and Cherry Hill have the opposite: a subfloor of individual 1x6 boards. Each board shrinks and swells on its own, so tile never goes straight onto them. A layer of plywood underlayment goes down first. It is screwed or nailed into the boards only, never into the joists, because fasteners that catch a joist can work loose later and crack the tile over them.
Concrete Slabs, Cracks and New Concrete
Concrete is stiff enough for any tile, so on a slab the question is cracks. When tile is bonded to concrete, a crack in the slab will reflect straight up through the tile. The answer is a crack isolation membrane, a thin sheet or troweled coating that stretches over the crack so the movement never reaches the tile.
Two more slab details decide whether a floor stays whole. The saw-cut control joints in a slab are where it is designed to crack, and tile should not be bonded straight across one.
New concrete also keeps shrinking as it cures. The common rule is to wait 28 days before tiling, though some thinset makers allow 14 with a premium latex-modified mortar. If you have just poured a basement floor or an addition, build that wait into the schedule.
Does a Floor Have to Be Level for Tile?
No. A tile floor has to be flat, which is different from level. A floor can slope gently to one side and take tile well, as long as it has no humps or dips. Tile set in thinset follows whatever shape is under it, and thinset is not meant to fill low spots.
The flatness standard tightens with tile size. For tile under 15 inches on every side, the floor can vary no more than 1/4 inch over 10 feet, or 1/16 inch over a foot.
For any tile with a side of 15 inches or more, the limit halves: 1/8 inch over 10 feet, or 1/16 inch over 2 feet. A long tile bridges a dip that a small one would settle into, so its ends sit at different heights from its neighbors. Reaching that flatness takes a troweled patch or a pourable self-leveling underlayment before the backing goes down, and it is one reason large tile costs more to install well.
Backer Board, Membranes and Other Layers Under Tile
Over a wood subfloor, tile sits on a backing layer that gives the thinset a stable surface to grip. The two common choices are cement backer board and uncoupling membrane. Both are accepted methods when they go down the way their maker specifies.
Cement backer board is a rigid sheet screwed over the plywood. It gives tile a surface that won't swell, though it adds no stiffness to the floor. On a floor, it is set into a bed of thinset and fastened on its maker's screw pattern, with the seams taped and filled. Any low spot is patched before the board goes down, since a patch on top of it would end up under the tile.
An uncoupling membrane is a thin plastic sheet with a fabric back, bonded to the plywood with thinset. It lets the tile and the wood move a little independently, which keeps seasonal wood movement from cracking the tile. At about 1/8 inch thick, it is the better fit where the new floor has to meet a hallway or a door without a tall step.
Which one goes down depends on the floor, the height available and the tile. On a slab, the layer is a crack isolation membrane, either over the cracks or over the whole floor.
If you want a heated floor, this is the stage for it. Electric radiant heat is a mat of heating cable laid under the tile, and tile is one of the best floors for it because it carries heat so well. The mat goes down before the tile, and hooking it up is a job for an electrician.
Laying Out the Tile Before Any Is Set
A good layout is worked out on the floor with chalk lines and loose tile before any thinset is mixed. You want a floor that looks centered from the doorway, with no thin slivers of tile along the walls or at the thresholds.
It starts with lines snapped between the midpoints of opposite walls, crossing in the middle of the room. A row of loose tile, with spacers, goes along each line. If a row leaves a cut of less than half a tile at a wall, the line shifts half a tile.
Few rooms are truly square, so the lines are checked with the 3-4-5 rule. Mark 3 feet along one line and 4 feet along the other. If the distance between the two marks is 5 feet, the lines are square. If it isn't, one line gets adjusted until it is.
Tile also varies slightly in shade from carton to carton, so tiles are pulled from several boxes as they are set. That spreads the variation across the room instead of leaving one patch a shade off.
Patterns, Joint Width and Grout Color
For long rectangular tile laid in a brick pattern, we recommend an offset of a third of the tile's length rather than the classic halfway. Long porcelain tiles have a slight bow, and a halfway offset puts the high middle of one tile beside the low end of the next, so the edges end up at different heights. The installation standard caps the offset at a third for any tile over 15 inches unless the tile maker says otherwise.
Joint width is set by the tile itself. The grout joint has to be at least three times the size variation between tiles in the box, and never narrower than 1/16 inch. Rectified tile, ground square at the factory, can take a narrow joint. Tile with softer pressed edges needs a wider one to keep the lines straight.
Grout color changes how the finished floor looks. A grout that contrasts with the tile outlines every joint and shows every small difference in tile size and spacing, while a grout close to the tile color quiets them. A contrasting grid can look great; just choose it knowing the lines will be on display.
Setting Tile in Thinset So It Stays Bonded
A tile stays down because thinset mortar grips most of its back, and the installation standard spells out how much. Mortar has to touch at least 80 percent of each floor tile in a dry room and 95 percent in showers and outdoors, with every corner supported. Natural stone needs 95 percent everywhere.
Getting there takes the right mortar and the right trowel. Porcelain is dense and harder to bond than ordinary ceramic, so it needs a polymer-modified thinset rated for it, and large tile gets a mortar made for large, heavy tile.
The thinset is pressed into the backing with the flat side of the trowel and combed into ridges with the notched side. Each tile is then pressed in and shifted slightly across the ridges to collapse them. Large tiles also get a thin coat of mortar on their backs, which is called back-buttering.
Coverage is checked by lifting a tile. Pulling up a freshly set tile now and then shows how much of its back the mortar reached. A floor that looks perfect on top can be sitting on stripes of mortar with gaps between them, and those gaps are where a dropped pan cracks a tile and where hollow spots begin.
Tiles are set one at a time and pressed in with a slight twist. Cuts are made on a wet saw, which keeps down the silica dust that dry cutting throws into the house.
As each area goes down, neighboring edges are checked against each other. The standard allows a height difference of just 1/32 inch between adjacent floor tiles with a normal joint, plus whatever bow the tile itself has. On large tile, leveling clips between the tiles help hold that while the thinset sets.
Movement Joints and the Gap at the Walls
Every tile floor needs room to expand and contract, and the Tile Council of North America calls for movement joints in every installation. A movement joint is a soft joint, filled with flexible caulk instead of grout, placed at the edges of the floor and wherever the tile meets something that moves differently.
In an ordinary room, that means a gap of at least 1/4 inch between the tile and every wall, left open and later covered by the baseboard. Where tile meets a tub, a cabinet, a step or a different floor, the joint gets caulk in a color matched to the grout. Those surfaces move on their own, and grout there cracks.
Large open floors also need joints through the field of the tile, roughly every 20 to 25 feet each way, and every 8 to 12 feet where strong sun hits the floor through a slider or big windows. Floors laid over a crack isolation membrane need them just the same.
Leaving these joints out causes some of the worst tile failures. A floor with no room to move can push itself up into a tent, with a line of tiles popping loose. Far more often it shows up as grout cracking where the floor meets the walls. If one question on a quote is worth asking twice, it is where the movement joints will go.
Grouting, Curing and When You Can Use the Floor
Grout goes in once the thinset has set, and the floor needs a few more days before it takes full use. Dal Tile's instructions give the usual timing: no walking on new tile until it sets, usually 24 hours; grout about 24 hours after setting; 72 hours before heavy use; and no sealers or polishes for three weeks. Rapid-setting mortars and grouts shorten those waits, and their packages give the times.
Joints narrower than 1/8 inch take unsanded grout. Joints 1/8 inch and wider take sanded grout, which has the body to fill them without shrinking.
The grout is forced into the joints with a rubber float held at an angle, the excess is scraped off, and the surface is sponged once the grout firms up. The haze left behind is buffed off when it dries. The corners at walls and tubs are left for caulk.
How Long Does Tile Installation Take?
A small room can be tiled one day and grouted the next, and most kitchens and bathrooms take a few days from tear-out to a usable floor. What stretches the schedule is the floor underneath. Removing the old floor, repairing the subfloor, curing a self-leveler or waiting on new concrete all add time before the first tile goes down.
Once the grout is in, plan on the three-day wait before moving heavy appliances or furniture back onto the floor.
How to Tell a Tile Floor Was Installed Right
A good tile floor looks right from where you normally stand, feels solid underfoot and has caulked edges at the walls and tub. The industry judges a finished floor from standing height, in the room's own lighting, with no flashlight held low across it. Anything you can only see on your hands and knees with a light at a low angle falls within what the standard accepts.
Once the grout has cured, six quick checks tell you most of what you need to know.
| Check | What you want to see | What a miss points to |
|---|---|---|
| Stand in the doorway | Centered layout, no slivers | Layout not planned first |
| Sight along the grout lines | Straight lines, even widths | Spacing or joint width off |
| Walk it in socks | No edge catching your foot | Tile edges set at uneven heights |
| Tap tiles with a coin | A solid click, tile after tile | Hollow spots, thin coverage |
| Look at walls and tub | Flexible caulk, not grout | No movement joint at the edges |
| Look closely at the grout | Full joints, no pinholes or haze | Grout mixed or cleaned poorly |
A hollow sound deserves a closer look before it becomes a worry. A tile can sound hollow and still be well bonded, and over a concrete slab that doesn't move, a hollow spot or two rarely means trouble. Over a wood floor it matters more, because movement there tends to break the rest of the bond over time.
What Changes the Price of a Tile Floor
The price of a tile floor depends more on the floor under it and the size of the tile than on the tile itself. Two quotes for the same tile in the same room can be far apart because one includes stiffening, flattening and a membrane while the other assumes the floor is fine.
The biggest cost drivers are removing the old floor, repairing or adding to the subfloor, flattening for large tile, and the backing layer. Patterns matter too, since herringbone and diagonal layouts mean more cuts and more waste. Natural stone needs its stiffer floor and fuller coverage, and every doorway needs trim and a transition.
When you compare quotes, ask each one three things: how the subfloor will be prepared, which backing goes down, and where the movement joints will be. A quote that answers all three is pricing a floor built to last. We price tile work at the free in-home estimate, where we can see the floor, feel how it moves and measure it, and financing for your flooring project can spread the cost if that helps.
Tile Installation With Rodrigues Flooring
At Rodrigues Flooring, we install tile floors for homes and businesses across South Jersey from our showroom in Moorestown. Our flooring services include subfloor repair, so a bouncy or damaged floor is fixed before any tile goes down, along with job supervision and coordination and trim work, including the baseboards that cover a new floor's edges.
You can browse our porcelain and ceramic tile from Chesapeake Flooring, Dal Tile and Tesoro before you visit, and our design consultation helps you settle the size, pattern and grout color for your room. We are a family business run by three brothers, with more than 20 years in flooring and licensed installers, and you can read more about our family and our work.
Tile Installation Questions We Hear Most
Can a Beginner Install Tile?
Yes, on a small room with a sound floor, but the hard parts are the ones a first-timer can't see. Setting and grouting can be learned in an afternoon. Judging whether a subfloor is stiff enough, flattening a floor for large tile and getting full mortar coverage under big porcelain are where first jobs fail.
Can You Tile Over Existing Tile or Vinyl?
Yes, in the right conditions. Tile over old tile is common when the old tile is well bonded and the extra height works at doors and appliances. Sheet vinyl can take tile only if it is a single layer, stuck down everywhere rather than just at the edges, and not cushioned or foam-backed. Carpet glue has to come off completely, because it softens when it gets wet.
Even so, our advice in most rooms is to take the old floor up, because it exposes the subfloor so any problem can be fixed before tile covers it.
How Much Extra Tile Should I Buy?
About 10 percent more than the room measures, and keep the leftover boxes. Tile colors shift slightly from one production run to the next over the years, and a stored box is the surest way to match a tile if one ever cracks.
Do I Need to Seal the Grout?
It depends on the grout: some types need a sealer and some don't, and the grout maker's instructions say which. If yours does, wait about three weeks for the grout to cure first. To tell when it needs resealing later, drop a little water on a joint: if it beads up, the sealer is working, and if it soaks in, it's time.
Is Porcelain or Ceramic Tile Better for a Floor?
Porcelain is the tougher of the two, and both make excellent floors indoors. Porcelain absorbs almost no water, which suits bathrooms, entries and basements, while ceramic is a little easier to cut. For any floor that gets wet, check the tile's wet slip rating; tile made for wet interior floors should test at 0.42 or higher. Our guide to porcelain and ceramic tile covers the differences in more detail, and our kitchen floor comparison shows how tile holds up next to luxury vinyl and hardwood.
Start With the Floor Under Your Tile
A tile floor is only as good as the floor it sits on, so that is where a good tile job starts. If you are planning a tile floor, book a free in-home estimate. We'll check the floor you have, tell you what it needs before tile, and help you choose the tile to go on it.


